Insulation
Improving your home’s insulation is a crucial step in enhancing its energy efficiency. A well-insulated home maintains a consistent internal temperature, reducing the strain on your heating and cooling systems and ultimately lowering your energy bills. This section will explore various insulation types, installation processes, and methods for assessing your home’s current insulation levels.
Insulation Materials for Exterior Walls, Roofs, and Foundations
Several materials offer excellent insulating properties, each with its own strengths and weaknesses. The choice depends on factors such as budget, climate, and the specific area being insulated. Common materials include fiberglass, cellulose, mineral wool, spray foam, and rigid foam boards.
| Insulation Type | R-Value per Inch | Cost (Approximate per unit) | Advantages |
|---|---|---|---|
| Fiberglass Batt | R-3 to R-6 | Low | Easy to install, readily available, relatively inexpensive. |
| Cellulose | R-3.1 to R-3.7 per inch | Moderate | Excellent thermal performance, made from recycled materials, good sound dampening. |
| Mineral Wool (Rockwool or Glasswool) | R-2.5 to R-4 | Moderate | Fire resistant, moisture resistant, good sound absorption. |
| Spray Foam (Open-cell or Closed-cell) | R-3.6 to R-6.5 (open-cell), R-6 to R-7 (closed-cell) per inch | High | Excellent air sealing, high R-value, can fill irregular spaces. |
| Rigid Foam Boards (Polyurethane, Polyisocyanurate, Extruded Polystyrene) | R-4 to R-8 per inch | Moderate to High | High R-value, durable, suitable for exterior applications. |
*Note: R-values and costs are approximate and can vary based on product specifications and location. Always consult with a local insulation professional for accurate pricing and recommendations.*
Exterior Insulation Installation
Installing exterior insulation requires careful consideration of existing siding and potential moisture problems. Improper installation can lead to water damage and mold growth. For existing siding, options include applying insulation over the siding (with appropriate weather barriers) or removing the siding and installing insulation directly to the sheathing before reinstalling the siding. In either case, a continuous and properly sealed weather barrier is essential to prevent moisture intrusion. Proper ventilation is also critical to allow moisture to escape. For example, installing a rain screen between the insulation and the siding allows for air circulation.
Assessing Current Insulation Levels
A visual inspection can provide a preliminary assessment of insulation levels. Look for visible gaps or areas where insulation appears thin or insufficient. However, a more thorough assessment might require accessing the attic or crawl space to measure the thickness of existing insulation and determine its R-value. Using a thermal imaging camera can also reveal areas with inadequate insulation, as these areas will appear colder (or warmer, depending on the season) on the camera’s display. This information is vital for determining the appropriate type and amount of additional insulation needed. A professional energy audit can provide a comprehensive assessment of a home’s insulation and energy efficiency.
Windows and Doors
Windows and doors, while essential for natural light and ventilation, are often significant sources of energy loss in a home. Air leaks around poorly sealed frames and inefficient glazing can drastically reduce your home’s energy efficiency, leading to higher heating and cooling bills. Upgrading these elements can provide substantial savings and increased comfort. This section will detail strategies for improving the energy performance of your windows and doors.
Sealing Air Leaks Around Windows and Doors
Identifying and sealing air leaks is a crucial first step in improving the energy efficiency of your windows and doors. Air leaks can be detected using a simple visual inspection, but a more thorough assessment can be achieved using an incense stick or a smoke pencil. By observing the movement of smoke near windows and doors, you can pinpoint the exact location of drafts. This allows for targeted sealing, maximizing the impact of your efforts.
- Caulk: A versatile sealant ideal for filling gaps and cracks around window and door frames. Choose paintable caulk for a seamless finish.
- Weatherstripping: Available in various materials (foam, rubber, felt), weatherstripping creates a seal between the door or window and its frame. Choose the type appropriate for the gap size and material of your frames.
- Foam sealant spray: Effective for larger gaps and cracks, foam sealant expands to fill spaces, providing a strong and insulating seal. Be mindful of over-application, as excess foam can be difficult to remove.
- Door sweeps: These are typically attached to the bottom of exterior doors to seal the gap between the door and the threshold, preventing drafts.
Comparison of Window Energy Efficiency
Different window types offer varying levels of energy efficiency, impacting your home’s energy consumption and comfort. The table below compares three common types:
| Window Type | U-Factor (BTU/hr·ft²·°F) | Energy Efficiency |
|---|---|---|
| Single-pane | 6.0 – 7.0 | Low; significant heat transfer |
| Double-pane | 2.0 – 4.0 | Moderate; improved insulation compared to single-pane |
| Triple-pane | 1.0 – 2.0 | High; excellent insulation, minimizing heat transfer |
*Note: U-factor represents the rate of heat transfer through a window. Lower U-factors indicate better insulation.*
Benefits of Low-E Coatings and Gas Fills in Windows
Low-E (low-emissivity) coatings and gas fills significantly enhance window energy efficiency. Low-E coatings are microscopically thin, transparent layers applied to the glass that reflect infrared radiation (heat). This reduces heat transfer, keeping your home warmer in winter and cooler in summer. Gas fills, such as argon or krypton, are inserted between the panes of double- or triple-pane windows. These gases are better insulators than air, further reducing heat transfer and improving the window’s overall energy performance. The combination of Low-E coatings and gas fills results in windows with substantially improved U-factors, leading to considerable energy savings over the lifespan of the window. For example, a home with triple-pane windows featuring Low-E coatings and argon gas fill might experience a 30-40% reduction in energy costs related to heating and cooling compared to a home with older single-pane windows.
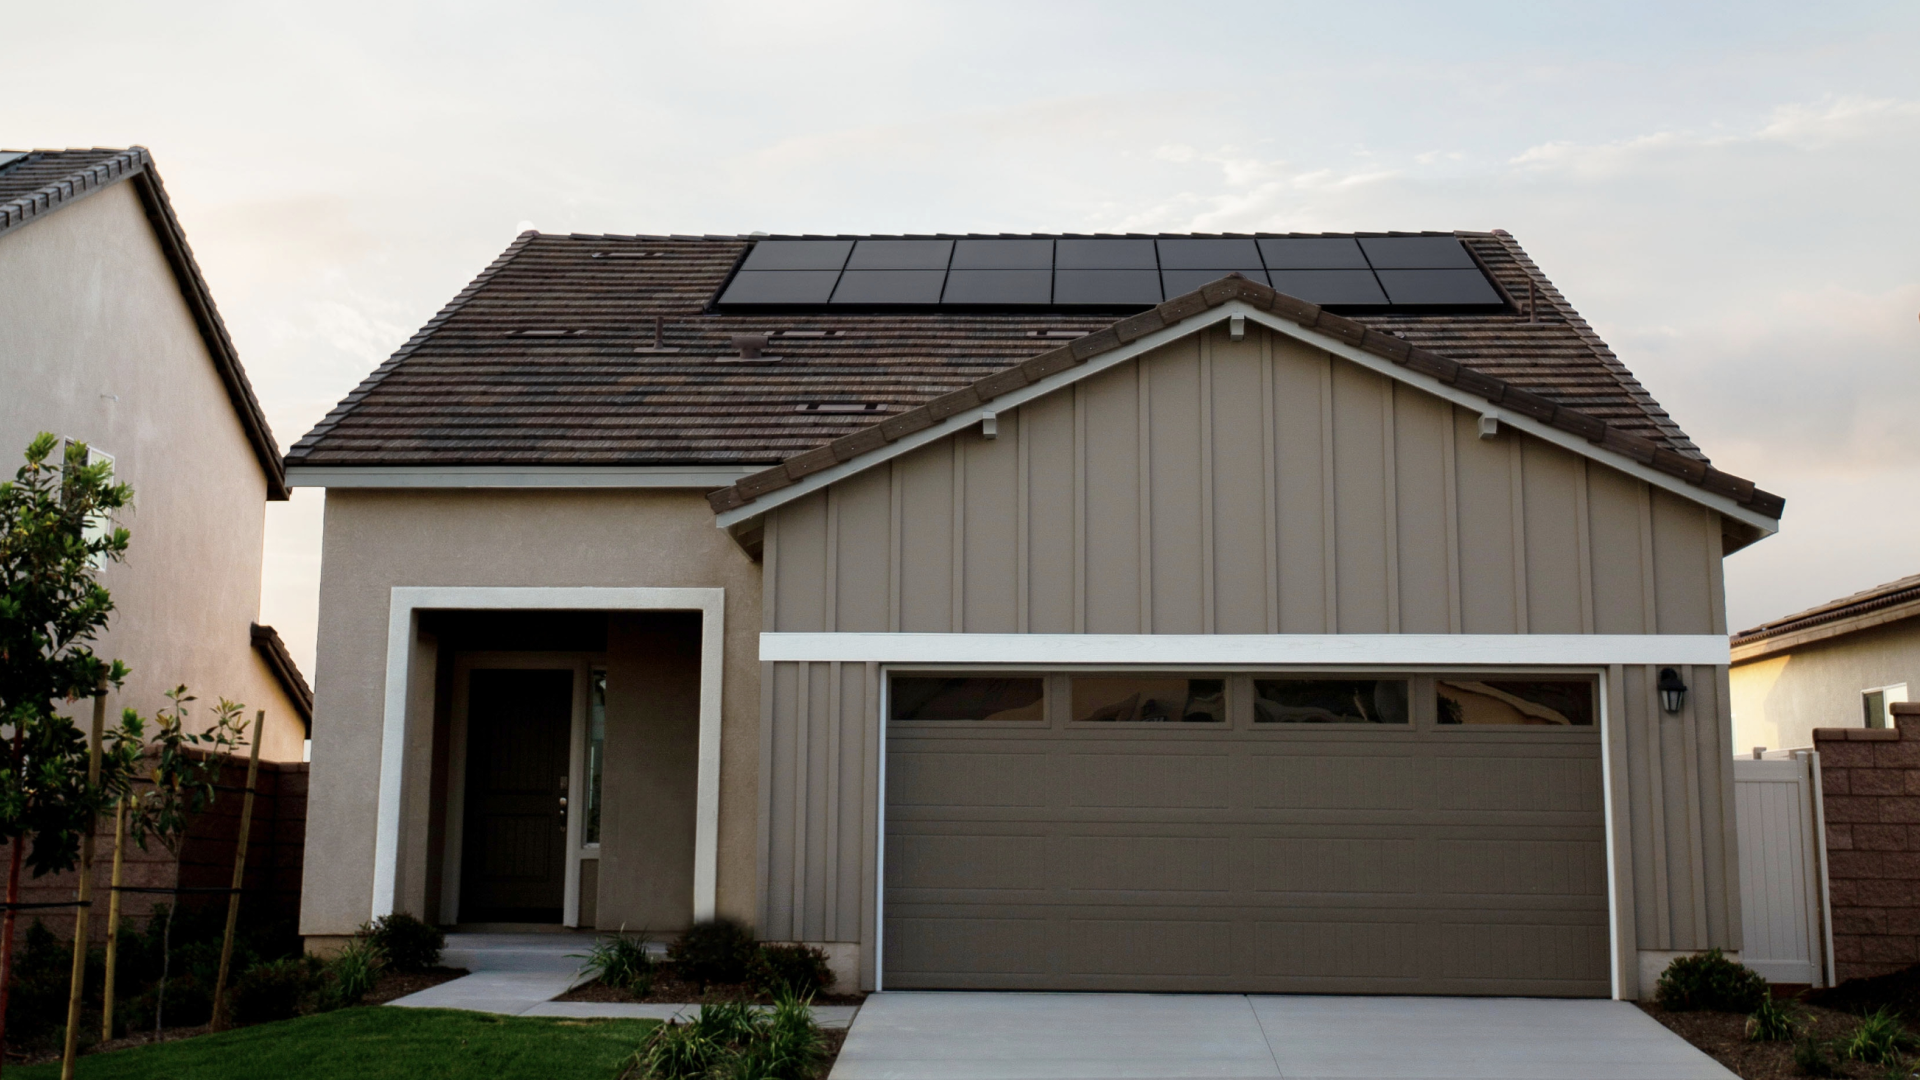
Roofing
Your roof plays a significant role in your home’s energy efficiency. Its color, material, and ventilation system directly impact how much heat is absorbed and retained, affecting your energy bills and overall comfort. By understanding these factors and making informed choices, you can significantly improve your home’s energy performance.
Roof Color and Material Impact on Energy Efficiency
The color and material of your roof significantly influence its ability to reflect or absorb solar radiation. Darker-colored roofs absorb more sunlight, converting it into heat that radiates into your attic and subsequently your home. This leads to increased cooling costs during warmer months. Conversely, lighter-colored roofs, particularly those with high albedo (reflectivity), reflect a greater portion of sunlight, reducing heat absorption and lowering energy consumption. High-albedo roofing materials, such as certain types of white or light-colored tiles, metal roofing coated with reflective pigments, and cool roofing membranes, can significantly reduce the heat transfer to your home’s interior. For example, a white roof can reflect up to 80% of solar radiation, compared to a dark-colored roof that might only reflect 10-20%. The material itself also matters; materials with high thermal resistance, like clay tiles or properly installed metal roofing, offer better insulation than asphalt shingles.
Improving Roof Ventilation to Reduce Attic Heat Builout
Proper attic ventilation is crucial for preventing heat buildup. A well-ventilated attic allows hot air to escape, preventing it from transferring into the living spaces below. This is achieved through a balanced system of intake and exhaust vents. Intake vents, typically located in the soffits (the overhangs beneath the eaves), allow cool outside air to enter the attic. Exhaust vents, often placed at the roof’s peak or ridge, allow the heated air to escape. An unbalanced system, with insufficient intake or exhaust, can lead to poor ventilation and increased energy consumption.
A diagram illustrating proper ventilation would show soffit vents at the lower edge of the roof, allowing air to enter the attic. This cool air would then rise and be drawn out through ridge vents located along the peak of the roof. Another diagram could illustrate gable vents located at the ends of the attic space, providing an alternative exhaust pathway for hot air. Proper placement and sizing of these vents are crucial for effective ventilation. In a poorly ventilated attic, the diagram would show stagnant, hot air trapped inside, while a well-ventilated attic would illustrate a clear flow of air from the soffit vents to the ridge or gable vents. Consideration should also be given to the use of baffles to prevent insulation from blocking soffit vents.
Roof Condition Evaluation Checklist
Regular roof inspections are essential for maintaining energy efficiency and preventing costly repairs. A thorough inspection should include:
- Visual inspection for missing, damaged, or curled shingles: Look for signs of wear and tear that could compromise the roof’s integrity and its ability to insulate effectively.
- Check for signs of leaks or water damage: Water damage can weaken the roof structure and lead to mold growth, reducing energy efficiency and potentially causing structural issues.
- Examine the flashing around chimneys, vents, and skylights: These areas are prone to leaks, and proper sealing is crucial for preventing water infiltration.
- Assess the condition of the gutters and downspouts: Clogged gutters can lead to water damage and increase the risk of ice dams in colder climates.
- Inspect the attic for signs of insulation degradation or insufficient insulation: Inadequate insulation can significantly reduce energy efficiency.
- Verify proper ventilation: Ensure sufficient intake and exhaust vents are present and unobstructed.
Addressing any identified issues promptly will improve the roof’s energy performance and extend its lifespan. Ignoring minor problems can lead to more extensive and costly repairs later.
Siding
Choosing the right siding for your home can significantly impact its energy efficiency. Different materials offer varying levels of insulation and resistance to heat transfer, directly affecting your heating and cooling costs. Understanding these differences and proper installation techniques is crucial for maximizing your home’s energy performance.
The energy efficiency of siding is determined by its R-value (resistance to heat flow), thermal mass (ability to absorb and release heat slowly), and air permeability (how easily air passes through it). Higher R-values indicate better insulation, while lower air permeability means less air leakage. Thermal mass helps to moderate temperature fluctuations, reducing the workload on your HVAC system.
Siding Material Comparison
The following table compares the energy performance characteristics of common siding materials. It’s important to note that actual performance can vary based on factors such as thickness, installation quality, and climate.
| Siding Material | R-Value | Thermal Mass | Air Permeability |
|---|---|---|---|
| Vinyl | Low (0.8 – 1.0 per inch) | Low | Relatively Low |
| Wood | Moderate (0.9 – 1.2 per inch, varies by species) | Moderate to High | Moderate |
| Fiber Cement | Moderate (0.9 – 1.1 per inch) | High | Low |
| Metal (Aluminum, Steel) | Low (depending on insulation backing) | Low | Low |
Proper Siding Installation and Energy Efficiency
Proper siding installation is just as important as the material choice itself. Improper installation can lead to air leaks, moisture intrusion, and reduced energy efficiency. Key aspects of proper installation include:
- Using proper flashing and sealing around windows and doors to prevent water penetration and air leakage.
- Ensuring a continuous and airtight seal between the siding and the underlying sheathing to minimize drafts.
- Following manufacturer’s instructions for installation to ensure proper overlap and fastening.
- Using appropriate fasteners and ensuring they are properly driven to avoid gaps.
Air Sealing Behind Siding
Air sealing is a critical step in maximizing the energy efficiency of your home’s exterior. Air leaks behind siding can significantly reduce the effectiveness of insulation and lead to drafts and increased energy consumption. Addressing these air leaks involves using appropriate sealants and caulking to fill gaps and cracks between the siding and the underlying structure. This includes sealing around windows, doors, and any penetrations in the wall.
For example, gaps around electrical outlets or plumbing fixtures can create significant air leakage points. These should be carefully sealed using expanding foam or other suitable sealants. Regular inspection and maintenance of the siding and its surrounding areas can help identify and address any potential air leakage problems early on, preventing significant energy loss over time.
Exterior Lighting
Exterior lighting enhances curb appeal and security, but inefficient fixtures can significantly increase energy consumption. Switching to energy-efficient options not only reduces your environmental impact but also lowers your electricity bills. This section explores energy-saving choices for your home’s exterior lighting.
Energy-efficient exterior lighting relies on choosing the right fixtures and bulbs, as well as implementing smart design strategies. By carefully considering these factors, you can dramatically reduce energy usage without sacrificing illumination. This translates to cost savings and a smaller carbon footprint.
Energy-Efficient Exterior Lighting Fixtures
Several options offer significant energy savings compared to traditional incandescent or halogen bulbs. The most prominent advancement is the widespread adoption of LED technology.
- LED (Light Emitting Diode) Fixtures: LED bulbs consume significantly less energy than incandescent or halogen alternatives while producing comparable or superior light output. They also boast a much longer lifespan, reducing replacement costs. Look for fixtures specifically designed for outdoor use, ensuring they are weatherproof and durable.
- Motion Sensor Lights: These fixtures automatically turn on when motion is detected and turn off after a set period of inactivity. This feature drastically reduces energy consumption by only illuminating areas when needed, particularly effective in walkways, driveways, and garages.
- Solar-Powered Lights: Solar-powered lights utilize solar panels to charge internal batteries, providing illumination without direct connection to the electrical grid. While their light output may be less intense than some LED options, they are ideal for low-light applications and offer a completely sustainable lighting solution.
Calculating Energy Savings from LED Lighting
Switching to LED lighting can result in substantial energy savings. To calculate these savings, consider the following:
- Determine the wattage of your current fixtures and the number of hours they operate daily. For example, let’s say you have five 60-watt halogen floodlights that operate for 6 hours per night.
- Calculate the daily energy consumption: (Wattage x Hours x Number of Fixtures) / 1000 = Daily kilowatt-hours (kWh). In our example: (60 watts x 6 hours x 5 fixtures) / 1000 = 1.8 kWh per day.
- Replace the halogen bulbs with LED equivalents. A typical LED replacement for a 60-watt halogen might consume only 12 watts.
- Calculate the new daily energy consumption with LEDs: Using the same formula with the new wattage: (12 watts x 6 hours x 5 fixtures) / 1000 = 0.36 kWh per day.
- Determine the daily energy savings: Subtract the new daily consumption from the old daily consumption: 1.8 kWh – 0.36 kWh = 1.44 kWh per day.
- Calculate the annual savings: Multiply the daily savings by the number of days in a year (approximately 365): 1.44 kWh/day x 365 days/year = 525.6 kWh per year.
- Multiply by your electricity rate to find the annual cost savings: If your electricity rate is $0.15 per kWh, the annual savings would be: 525.6 kWh/year x $0.15/kWh = $78.84 per year.
The formula for calculating energy savings is: [(Old Wattage – New Wattage) x Hours of Operation x Number of Fixtures x Days of Operation x Electricity Rate] / 1000 = Annual Cost Savings.
Best Practices for Energy-Efficient Exterior Lighting Plans
Effective exterior lighting design goes beyond simply choosing energy-efficient bulbs. Careful planning optimizes both energy use and safety.
- Use motion sensors strategically: Focus motion sensors on areas requiring security lighting, such as walkways, entrances, and garages. Avoid using them in areas where constant illumination is unnecessary.
- Minimize light pollution: Direct light downwards to illuminate specific areas, preventing unnecessary spillover into the sky or neighboring properties. Use shielding or baffles on fixtures to control light direction.
- Choose appropriate light color temperature: Warmer color temperatures (2700-3000K) create a welcoming ambiance, while cooler temperatures (5000K and above) provide brighter, more task-oriented illumination. Select the color temperature that best suits each area’s purpose.
- Consider using timers or dimming controls: Timers allow for automated control of lighting schedules, ensuring lights are only on when needed. Dimmers can reduce energy consumption by lowering light output when full brightness isn’t required.
- Regularly maintain your fixtures: Clean fixtures regularly to remove dust and debris, ensuring maximum light output and efficiency. Replace burned-out bulbs promptly.
Landscaping
Strategic landscaping plays a crucial role in enhancing your home’s energy efficiency and reducing your environmental impact. By carefully considering the placement and types of plants, you can significantly decrease your energy consumption, particularly for heating and cooling. This involves harnessing the power of nature to create a more sustainable and comfortable living environment.
Effective landscaping reduces energy consumption primarily by modifying the microclimate around your home. This is achieved through shading, windbreaks, and the management of evapotranspiration (the process by which water is transferred from the land to the atmosphere by evaporation from the soil and other surfaces and by transpiration from plants). These effects can significantly reduce your reliance on air conditioning and heating systems.
Strategic Tree Placement for Shade
Properly placed trees can provide substantial shade during the hottest parts of the day, reducing the amount of solar heat absorbed by your home’s exterior walls and roof. This directly translates to lower cooling costs. Deciduous trees, which lose their leaves in the fall, are particularly beneficial as they provide shade in the summer but allow sunlight to reach your home during the winter, helping to passively heat your home. The optimal placement of trees depends on the direction of the sun and prevailing winds.
Imagine a home facing south in the Northern Hemisphere. Planting deciduous trees to the west and south of the home will provide shade during the hottest afternoon sun. These trees should be positioned far enough from the house to allow for full sun during the winter months but close enough to provide shade during the summer. A visual representation would show a house with mature deciduous trees strategically positioned to cast shade on the south and west-facing walls during the summer months, while allowing sunlight to reach the house during the winter. The trees would be positioned approximately 15-20 feet from the house to avoid root damage and ensure proper sunlight penetration during winter. This arrangement provides optimal shading without obstructing winter sun.
Benefits of Drought-Tolerant Plants
Using drought-tolerant plants significantly reduces water consumption, which in turn lowers your water bill and reduces the energy needed to pump and treat water. Many drought-tolerant plants require less frequent watering, meaning less energy is used to power irrigation systems. Furthermore, selecting native plants adapted to your local climate minimizes the need for supplemental watering and fertilization, contributing to a more sustainable landscape. Examples of drought-tolerant plants vary depending on geographical location but often include succulents, certain types of grasses, and native shrubs. For instance, in arid regions, using cacti and agave plants requires significantly less water compared to traditional lawns, contributing to both energy and water savings. The reduction in water usage also lessens the strain on local water resources.
Exterior Paint
The color of your exterior paint plays a surprisingly significant role in your home’s energy efficiency. Choosing the right shade can contribute substantially to reducing energy consumption, particularly in regions with intense sunlight. By understanding the principles of solar reflectance, you can make an informed decision that positively impacts both your comfort and your utility bills.
Light-colored paints reflect a greater percentage of sunlight compared to dark-colored paints. This means that less solar heat is absorbed by your home’s exterior surfaces, reducing the amount of heat transferred into the interior. This, in turn, lowers the demand on your air conditioning system, resulting in decreased energy consumption and lower cooling costs. The difference can be substantial, particularly during the hottest months of the year.
High-Reflective Paint Properties
High-reflective paints, also known as cool paints or solar-reflective paints, are specifically formulated to maximize solar reflectance. These paints contain special pigments and additives that increase their ability to reflect sunlight. They typically have a higher solar reflectance index (SRI) than standard paints. The SRI is a measure of how effectively a material reflects solar radiation and emits absorbed heat. A higher SRI indicates better solar reflectance and heat emission, leading to lower surface temperatures and reduced cooling loads. For example, a white roof coated with a high-SRI paint might reach a temperature of 100°F on a hot summer day, while a similarly exposed dark-colored roof could reach 150°F or more. This temperature difference directly translates to energy savings. The effectiveness of high-reflective paints varies depending on the specific product and the application method. Proper surface preparation and multiple coats are crucial for achieving optimal performance. Many manufacturers provide detailed SRI values and application instructions for their products. Consumers should always refer to the product specifications before making a purchase.
Foundation
A well-insulated foundation is crucial for minimizing energy loss in your home. Heat transfer through the foundation can significantly impact your heating and cooling bills, particularly in climates with extreme temperature fluctuations. Addressing foundation insulation effectively can lead to considerable energy savings and increased comfort year-round. This section will detail common heat loss areas in foundations and provide practical solutions for improving their energy efficiency.
Common Areas of Heat Loss in Foundations
Heat loss through the foundation typically occurs in several key areas. These include the foundation walls themselves, the area beneath the floor (crawl spaces or basements), and any cracks or gaps in the foundation. Poorly insulated foundation walls allow heat to escape during winter and enter during summer, increasing the workload on your HVAC system. Uninsulated crawl spaces and basements act as large, unconditioned spaces, readily exchanging heat with the outside environment. Cracks and gaps provide direct pathways for air infiltration, further exacerbating heat loss. Addressing these areas strategically can dramatically improve the overall energy efficiency of your home.
Insulating Crawl Spaces
Insulating a crawl space involves several steps to effectively reduce heat transfer. First, ensure adequate ventilation to prevent moisture buildup, which can damage the insulation and lead to mold growth. Proper ventilation can be achieved through vents in the foundation walls, strategically placed to maximize airflow. Next, install a vapor barrier on the ground to prevent moisture from migrating upwards into the insulation. Polyethylene sheeting is a common and effective choice. Finally, install insulation between the floor joists, using fiberglass batts or rigid foam boards. The R-value of the insulation should be chosen based on your climate and local building codes. Proper installation is crucial to ensure the insulation’s effectiveness. Remember to seal any gaps or cracks around pipes and other penetrations to prevent air leakage.
Insulating Basements
Basement insulation requires a slightly different approach than crawl space insulation. The primary focus is on insulating the foundation walls and the basement ceiling. For foundation walls, rigid foam insulation boards are often preferred due to their high R-value and resistance to moisture. These boards can be attached directly to the walls using adhesive and mechanical fasteners. The basement ceiling, which is often the floor of the main living area, can be insulated using fiberglass batts or blown-in insulation. Similar to crawl spaces, a vapor barrier should be considered, particularly in humid climates, to prevent moisture problems. Again, sealing any cracks or gaps is essential to prevent air infiltration and maximize the insulation’s effectiveness.
Benefits of Vapor Barriers in Foundation Insulation
Vapor barriers play a critical role in preventing moisture from damaging insulation and compromising its thermal performance. Moisture can reduce the effectiveness of insulation by saturating the material, lowering its R-value. In addition, moisture can lead to mold growth, which poses health risks and structural damage. A vapor barrier acts as a shield, preventing moisture from migrating into the insulation. This extends the lifespan of the insulation, maintains its R-value, and protects the overall health and integrity of your home’s foundation. The placement of the vapor barrier depends on the climate; in cold, dry climates, it’s generally placed on the warm side of the insulation, while in warm, humid climates, it’s often placed on the cold side. Consulting with a building professional is advisable to determine the best placement for your specific climate and foundation type.
Gutters and Downspouts
Properly functioning gutters and downspouts are often overlooked in discussions of home energy efficiency, but their role in protecting your home’s exterior and, consequently, its energy performance is significant. Neglecting gutter and downspout maintenance can lead to costly repairs and increased energy consumption. This section will detail how maintaining these essential components contributes to a more energy-efficient home.
Maintaining clean and functional gutters and downspouts prevents water damage to your home’s exterior. Water damage, whether from overflowing gutters, clogged downspouts, or leaking connections, can lead to a variety of problems that directly impact energy efficiency. For instance, water intrusion can rot siding, weaken the foundation, and damage insulation, all of which compromise a home’s thermal envelope and necessitate costly repairs. These repairs, in turn, disrupt the home’s energy efficiency, leading to higher energy bills and a less comfortable living environment.
Water Damage and Energy Efficiency
Water damage significantly impacts a home’s energy efficiency in several ways. Waterlogged insulation loses its effectiveness, forcing your heating and cooling systems to work harder to maintain a comfortable indoor temperature. This increased workload translates directly into higher energy bills. Furthermore, water damage can lead to the growth of mold and mildew, which can further compromise the insulation’s ability to retain heat or cool air. Damaged siding, caused by water intrusion, also reduces the home’s ability to insulate effectively, increasing energy loss. Finally, foundation damage caused by water accumulation can lead to structural problems, requiring costly repairs and potentially impacting the building’s airtightness, further reducing energy efficiency. For example, a home with damaged foundation might experience drafts, increasing heating and cooling demands.
Gutter and Downspout Inspection and Maintenance Checklist
Regular inspection and maintenance are crucial for preventing water damage. The following checklist provides a guide for ensuring your gutters and downspouts are functioning optimally.
- Clean Gutters Twice Yearly: Clean gutters in spring and fall to remove leaves, debris, and other obstructions. This prevents clogs that can lead to overflows.
- Inspect Downspouts for Blockages: Check downspouts for clogs and ensure water flows freely to the ground away from the foundation.
- Check for Leaks and Damage: Examine gutters and downspouts for cracks, holes, or loose connections. Repair or replace damaged sections promptly.
- Verify Proper Grading: Ensure the ground slopes away from your foundation to prevent water from accumulating near the house. A slope of at least 6 inches over 10 feet is recommended.
- Inspect Gutter Connections: Check that all gutter sections are securely connected to prevent leaks. Ensure end caps are properly installed and sealed.
- Examine Downspout Extensions: Verify that downspout extensions direct water at least 5 feet away from the foundation. Consider extending them further if necessary.
- Consider Gutter Guards: Installing gutter guards can significantly reduce the frequency of cleaning, as they prevent many leaves and debris from entering the gutters.
By diligently following this checklist, homeowners can significantly reduce the risk of water damage and maintain a more energy-efficient home. Addressing gutter and downspout issues proactively prevents costly repairs and ensures the longevity and energy performance of the entire building envelope.
Professional Assessments
Investing in a professional assessment for your home’s exterior energy efficiency is a crucial step towards maximizing your savings and comfort. A thorough evaluation can pinpoint areas needing improvement, allowing for targeted upgrades and preventing costly mistakes. This proactive approach ensures that your investments are effective and yield the best possible return.
Energy Audits: Identifying Energy Inefficiencies
A professional energy audit provides a comprehensive analysis of your home’s energy performance. Certified auditors use specialized equipment, such as infrared cameras, to detect heat loss and air leaks. This detailed assessment identifies specific areas where energy is being wasted, such as poorly insulated walls, drafty windows, or inadequate sealing around doors. The audit report typically includes a prioritized list of recommended improvements, along with estimated costs and potential energy savings. For example, an audit might reveal that upgrading attic insulation is the most cost-effective measure, leading to a significant reduction in heating and cooling bills within the first year. Similarly, it might highlight air leaks around windows that are easily sealed, providing immediate energy savings. The audit provides a clear roadmap for improving your home’s energy efficiency.
Contractor Selection: Finding Qualified Professionals
Choosing the right contractor is essential for successful energy-efficiency upgrades. Look for contractors with proven experience, positive customer reviews, and relevant certifications. Verify their licenses and insurance to ensure they are legally operating and protected against potential liabilities. Check for affiliations with reputable organizations, such as the Building Performance Institute (BPI), which demonstrates a commitment to quality and professional standards. It is advisable to obtain multiple bids from different contractors to compare pricing and services. This competitive approach helps to ensure you are receiving fair and competitive pricing for the work.
Questions to Ask Potential Contractors
Before committing to a contractor, it’s crucial to gather all necessary information. Here are some essential questions to ask potential contractors:
- What is your experience with similar projects?
- Can you provide references from past clients?
- What are your qualifications and certifications?
- What materials will you use, and are they energy-efficient?
- What is your warranty policy for the work performed?
- What is your payment schedule?
- Do you have liability and workers’ compensation insurance?
- Can you provide a detailed written proposal outlining the scope of work, timeline, and costs?
- What is your process for addressing unexpected issues or changes during the project?
- What is your estimated completion timeline for the project?
By asking these questions, you’ll gain a clearer understanding of the contractor’s capabilities, ensuring you make an informed decision and avoid potential problems down the line. Thorough preparation and careful selection of a contractor are vital steps in improving your home’s energy efficiency.
Quick FAQs
What is the payback period for energy-efficient home exterior upgrades?
The payback period varies depending on the specific upgrade, climate, and energy prices. Some upgrades, like LED lighting, offer a quick return, while others, such as replacing windows, may take longer. A professional energy audit can help estimate the payback period for your specific situation.
Are government incentives available for energy-efficient home improvements?
Many governments offer tax credits, rebates, and other incentives for energy-efficient home improvements. Check with your local and national energy agencies to see what programs are available in your area.
How often should I inspect and maintain my gutters and downspouts?
It’s recommended to inspect your gutters and downspouts at least twice a year, in spring and fall, to remove debris and ensure proper drainage. Regular maintenance prevents water damage, which can negatively impact your home’s energy efficiency.